by Nina
 |
| Face by hand on a red background by Fernand Leger |
Yesterday I read a brief article in the New York Times 3 Ways to Relieve Work-From-Home Pains in which A.C. Shilton recommended some wrist stretches for people who have been working at home and spending a lot of time on their computers. The author said:
“Working all day at a computer can lead to overuse of some wrist muscles and underuse of others, said Abby Bales, a New York City-based physical therapist. Stretching your wrist flexors and extensors ‘prevents the wrist from getting locked into a smaller range,’ she said.
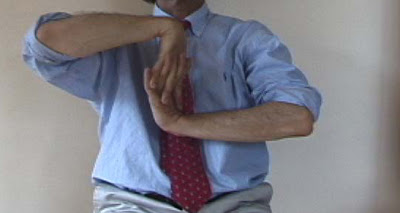
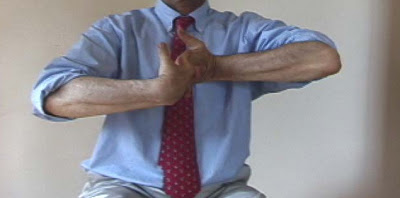
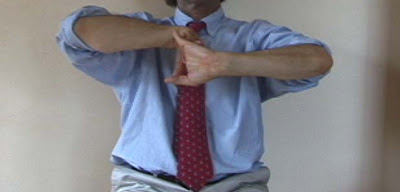
So I thought this would be a good time to revisit the information we have on our blog on “wrist flossing” because it’s actually more complete—and probably more effective—than the stretches in the New York Times. This sequence of wrist stretches was developed by Tom Alden, a chiropractor as well as a yoga teacher, and was featured in Timothy McCall’s book Yoga As Medicine, a book that I helped to edit and for which I produced the photoshoot. That’s when I learned about wrist flossing for the first time. This is a wonderful sequence you can do if you want to give your hands and wrists a break after marathon typing sessions, if you have wrist problems, such as carpal tunnel syndrome, or if you have over-worked your wrists doing yoga with a lot of weight bearing on your hands. There are three different “flossing” movements:
1. Palms Down. Start by interlacing your fingers and turning your palms to face the ground. Move your elbows out the sides, so both arms are parallel to the floor. Gently pull your wrists apart, so you feel a slight traction, then raise your right arm and lower your left, bringing your right wrist into a forward bend and your left wrist into a backbend. Allow your right arm to do all the work, while your left arm is passive.

Repeat the movement on the other side by using your left arm to do all the work while your right arm is passive. Go back and forth any number of times. Video of this movement is available here.
2. Palms Facing You. Start by interlacing your fingers and turning your palms in to face the ground. Move your elbows out the sides, so both arms are parallel to the floor. Now turn your palms inward, to face you. Gently pull your wrists apart, so you feel a slight traction, then move your right arm outward and your left inward, bringing your right wrist into a forward bend and your left wrist into a backbend. Allow your right arm to do all the work, while your left arm is passive.

Repeat the movement on the other side by using your left arm to do all the work while your right arm is passive. Go back and forth any number of times. Video of this movement is available here.
3. Palms Facing Away. Start by interlacing your fingers and turning your palms to face the ground. Move your elbows out the sides, so both arms are parallel to the floor. Now turn your palms outward, so they face away from you. Gently pull your wrists apart, so you feel a slight traction, then move your right arm inward and your left outward, bringing your right wrist into a forward bend and your left wrist into a backbend. Allow your right arm to do all the work, while your left arm is passive.

Repeat the movement on the other side by using your left arm to do all the work while your right arm is passive. Go back and forth any number of times. Video of this movement is available here.
See tomalden.com for information about Tom Alden. For information about Timothy McCall and his book Yoga As Medicine, see drmccall.com.
Follow Yoga for Healthy Aging on Facebook ° To order Yoga for Healthy Aging: A Guide to Lifelong Well-Being, go to Amazon, Shambhala, Indie Bound or your local bookstore.


Leave A Comment